Here is the last Fall inspired DIY : an upcycling Fall frame.
After seeing a lot of beautiful upcycling frames on Pinterest, I thought that it was time to make one for you, by adding my personnal touch to it.
« Upcycling », also known as creative reuse, is the art/process of transforming wasted products into new materials or objects.
For this DIY, I used a camembert box, and transformed it into a Fall frame. This cute frame is made with paper figurines. By creating notches with a paper cutter inside the wooden circle, the figurines hold in place really well like a perfect painting frame.
This upcycling frame represent an automnal landscape with a cute fox, some grass, and a tree with falling leaves. Such a poetic DIY ! You can use my drawings or create your own patterns if you want to. You will find below the different patterns I made to download.
This DIY is for children and adults.
Happy DIY !
What you need :

camembert box, pencil, black pen, gold spray, orange painting, paintbrush, colored papers (orange, green, red, white, brown), scissors, paper cutter, paper glue, 2 A4 sheets of patterns (download below)
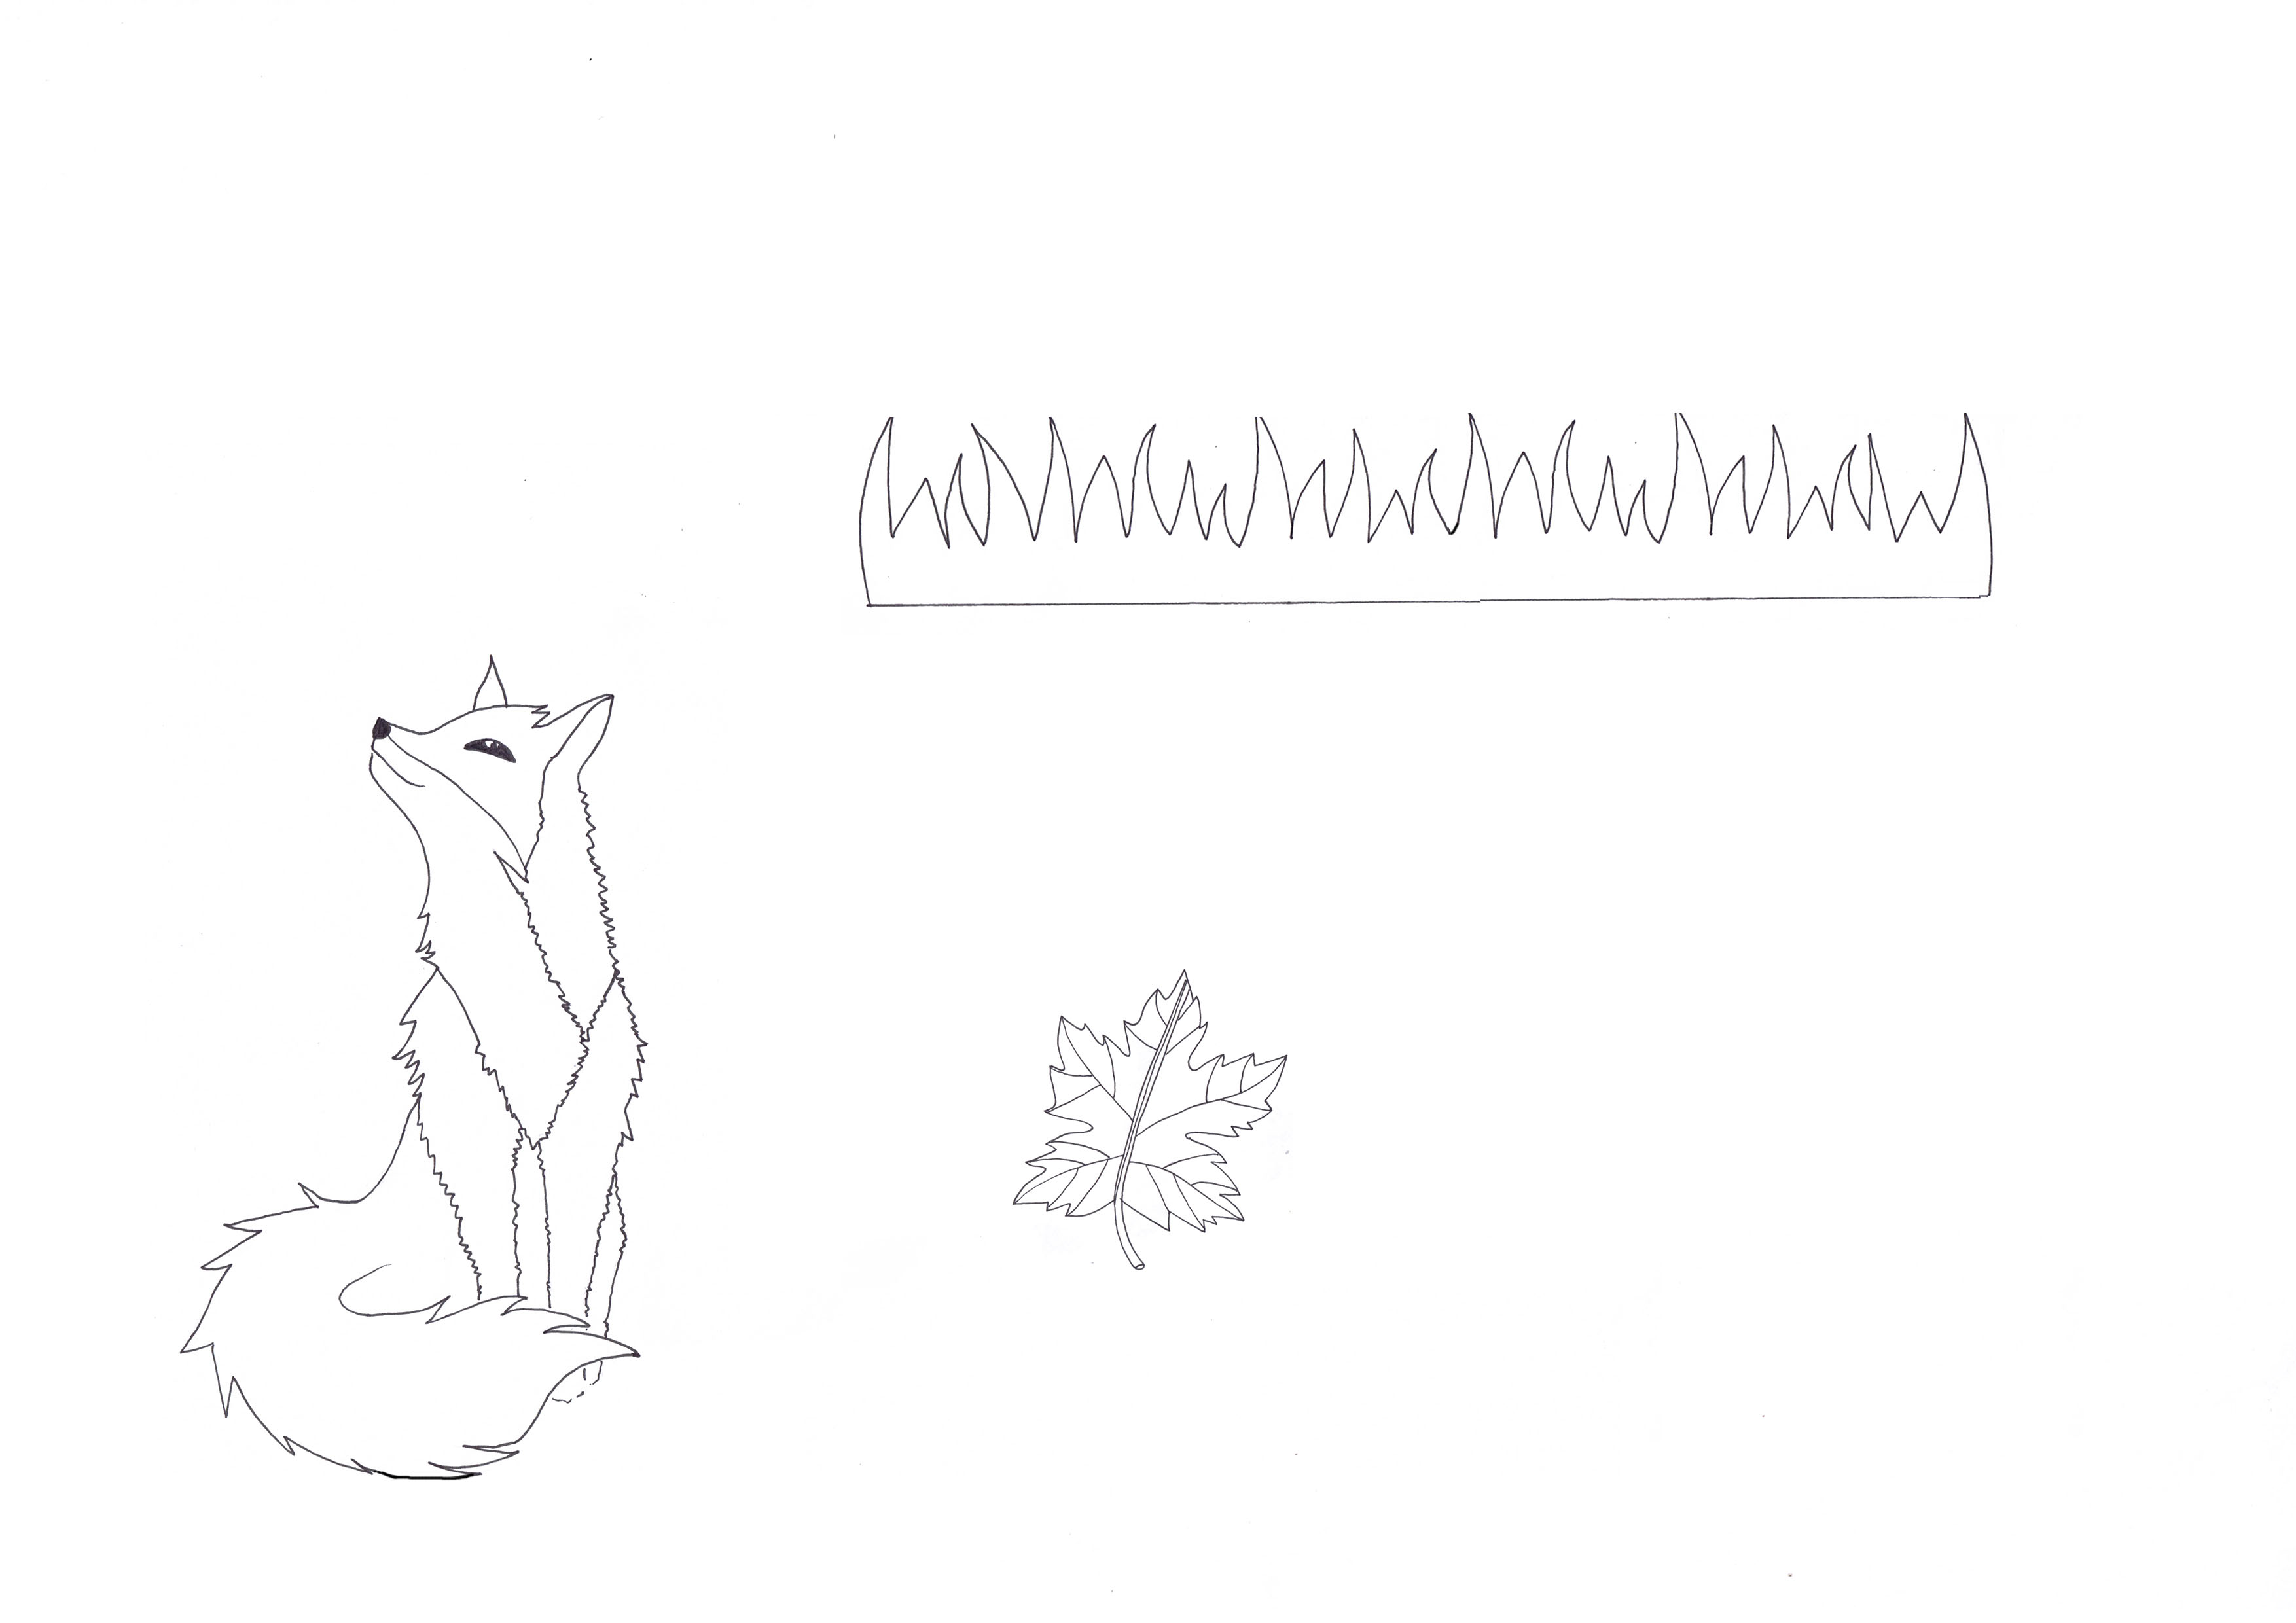
« Little fox » : to download, click here.

« Fall tree » : to download, click here.
Step 1 : Print the patterns on two A4 sheets of white paper.

Step 2 : Cut the patterns using scissors.

Step 3 : Place the cutted patterns on the colored papers. Line around the drawings with a pencil (leaf : red paper – tree : brown paper – grass : green paper – fox : orange paper). Then cut them using scissors.


Step 4 : For the fox, use the downloaded pattern as a model (like we did for the other patterns). Line around the drawing with a pencil, then cut it using scissors.

Draw black lines with a pen. Paste white paper on the specific areas : breast, paws, tail.

Step 5 : Then create your “canvas” (frame).

Step 6 : Place your canvas on top of the box. The paper figurines need to overpass the wooden circle (cf. image).

Step 7 : On each side of the camembert box, make notches with the paper cutter. The notches needs to correspond to the paper figurines.

Step 8 : Spray gold paint inside the camembert box (or any color you want). Let dry. Paint with orange painting the inside and outside of the wooden circle (or any other color). Let dry.

Step 9 : Take you paper cutter and remove any dry paint into the notches. Then install the paper figurines inside the notches.
Add glue to superimpose papers (leaves on the tree, grass on the three, fox on the tree).
And voilà ! A beautiful and lovely fall frame to hang anywhere you want !


Feel free to leave a comment if you liked this DIY ♥

Pin it on Pinterest :

Céline Lunakim


No Comments