
Since I moved into my apartment (mid-June), I have been slowly progressing with the layout of the space. After painting all the doors (double-sided), frames, and windows, it’s time to move on to decoration! With my lover, we agreed that I would do part of the decoration in DIY. Each room gradually begins to emerge, and I try to imagine creations according to the spaces.
For some time now, we have noticed the need for a pocket holder. After browsing Pinterest and its pins, I decided to go with this well-known version of the empty pocket, and add my own creative touch. I let you discover this new DIY without any further delay! 🍃
What you need:
- clay / self-hardening paste
- tracing paper (or baking paper)
- a precision cutter for creative hobbies
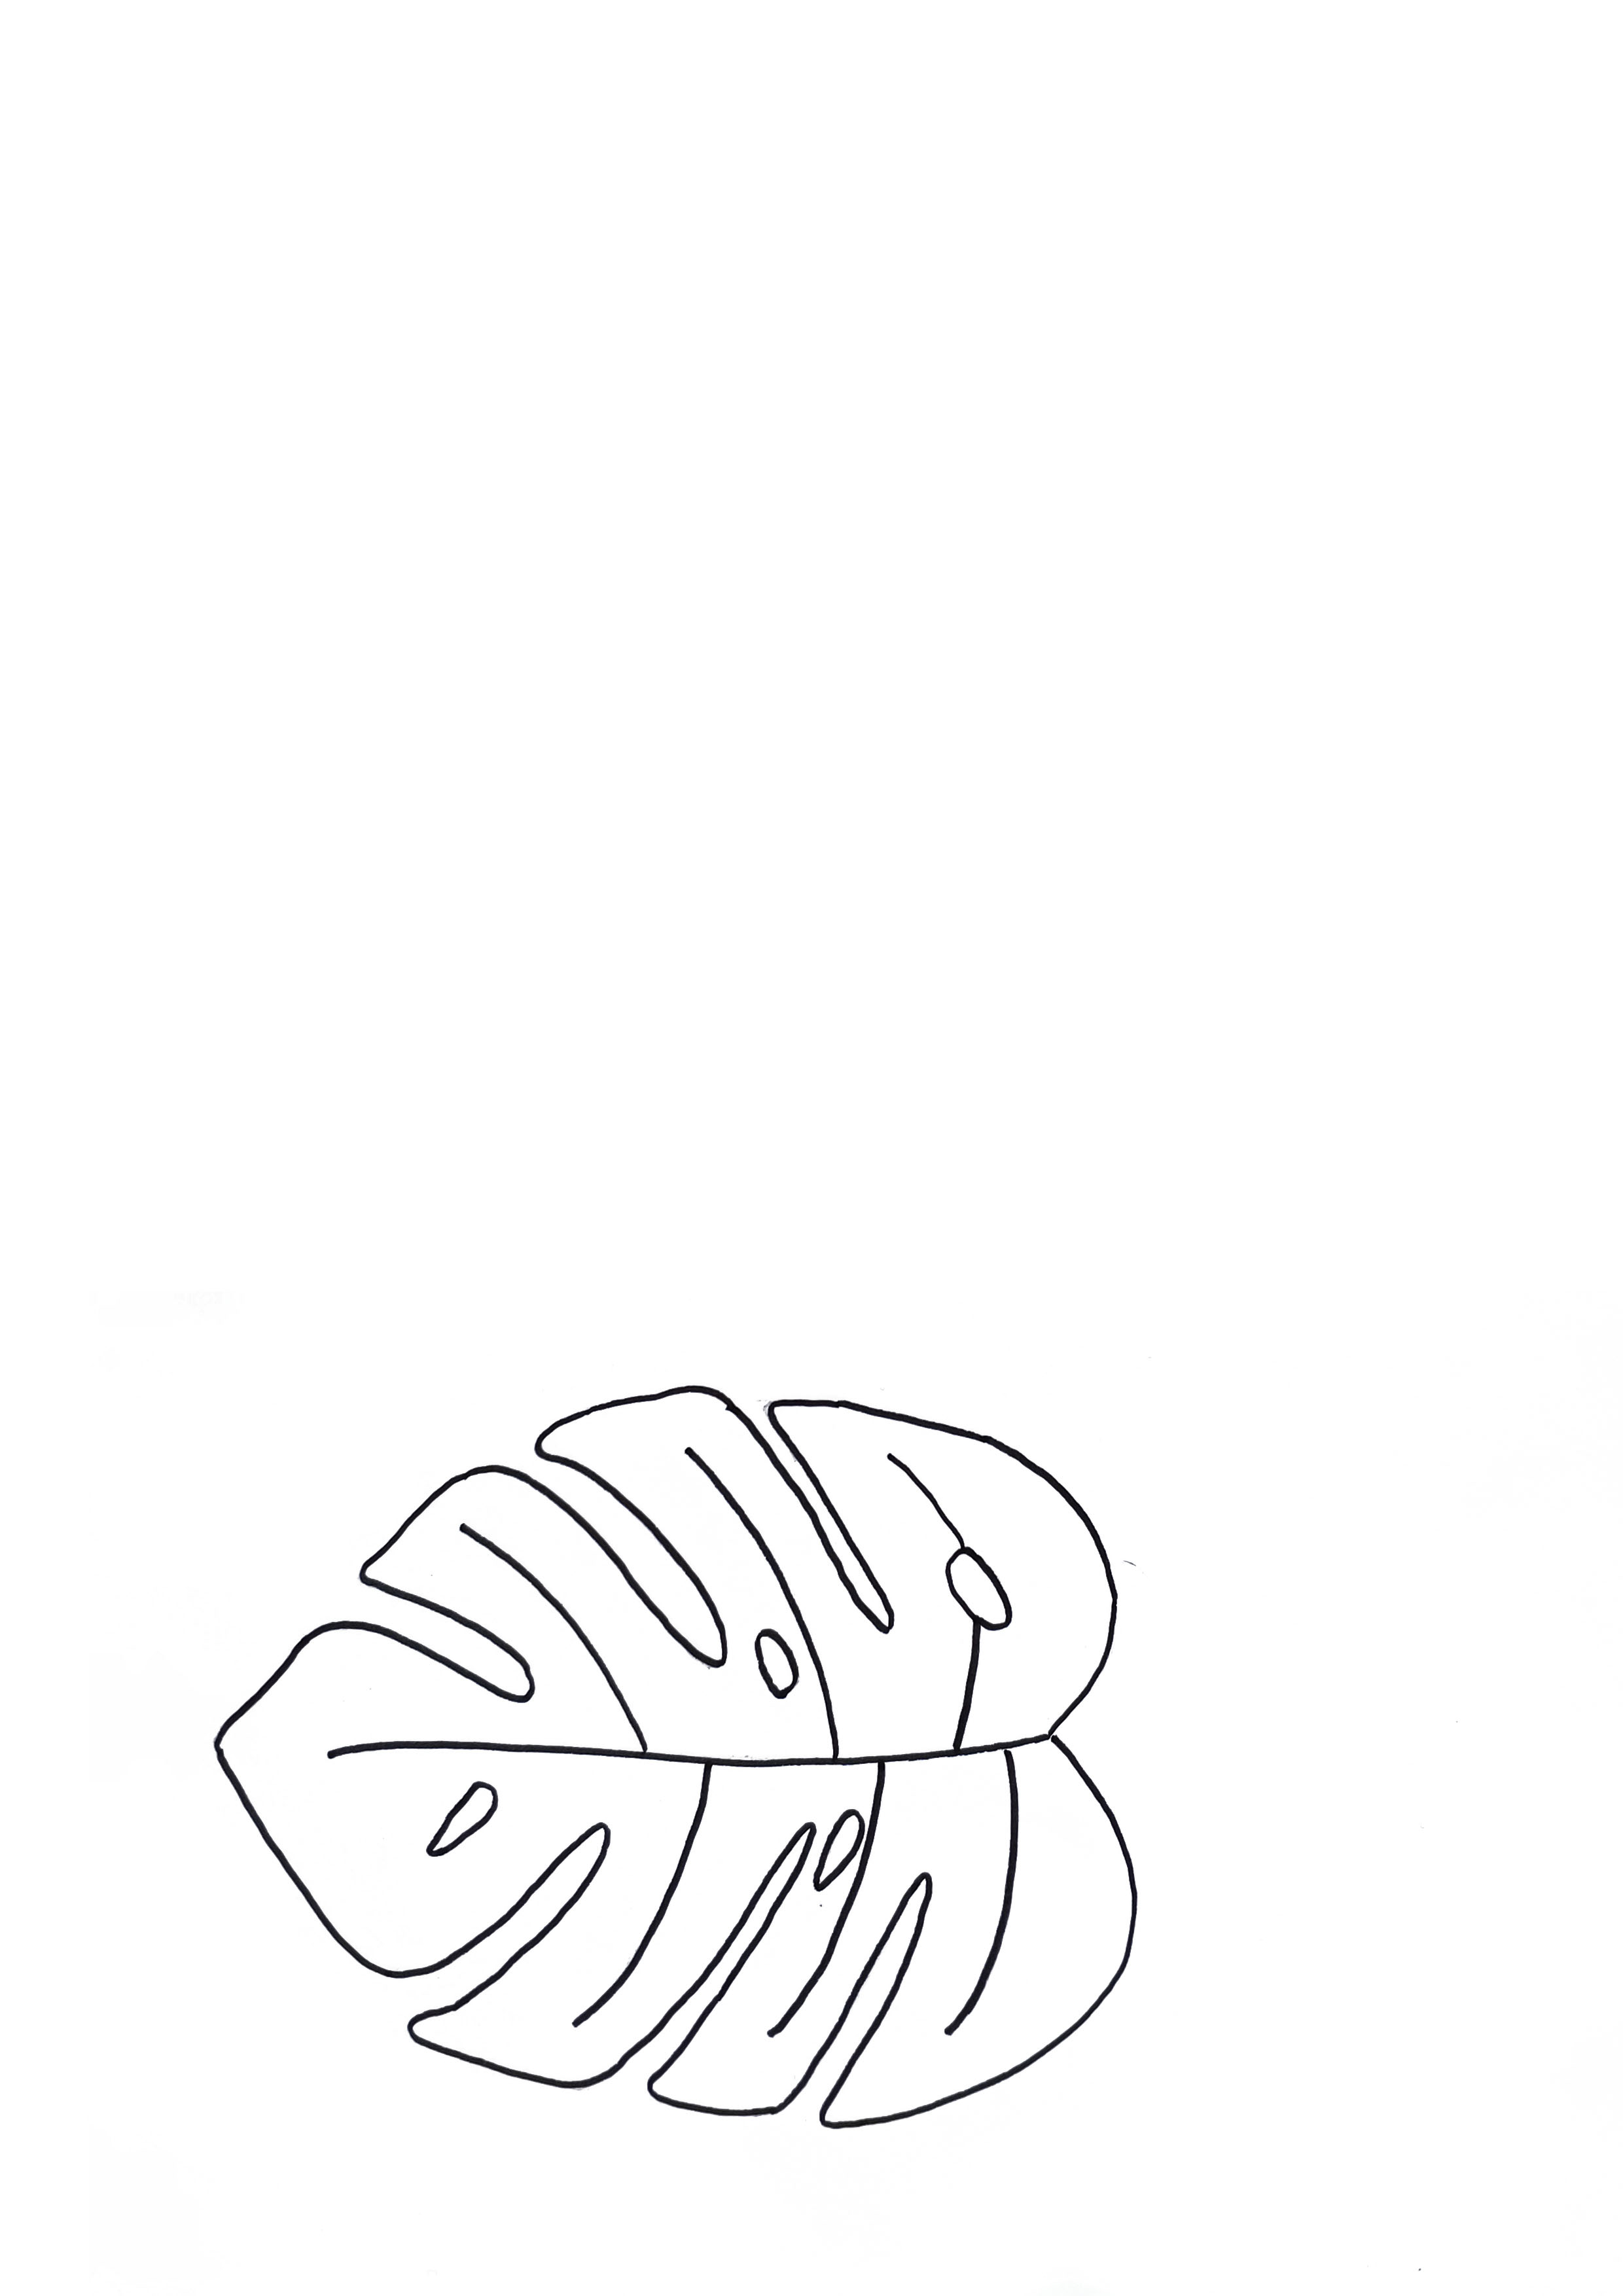
- the pattern sheet to be printed (A4 format)
- a bowl
- white & gold paint
- two brushes
- a rolling pin for pastry

Step 1/ Take a fairly large piece of clay, and place it on the baking paper on a hard surface. With your rolling pin, flatten the clay to form a flat layer of 0.5 cm. Be careful not to have a paste that is too thin, otherwise it will break.

Step 2/ Print the pattern on an A4 sheet (see material description). Cut around to only keep the pattern. Also cut out the inside of the marked holes.


Step 3/ Place the cut out pattern on the clay, and cut around it with the cutter. Be careful about details.


Step 4/ Remove the pattern sheet, and add the details using the tip of your paintbrush handle. If there are some imperfections, you can use a little water and smooth the surface with your finger.


Step 5/ Before the clay dries, place your clay on your support. The goal is for the leaf to give the impression of “closing in”. Allow it to rest for several hours or even a full day.


Step 6/ Once dry, remove the clay from the bowl. Your leaf is now solid! Let’s move on to the decoration. I opted to use gold and white. You can use different colours depending on your interior.
Paint the interior leaf golden with the large brush. Let it dry. Then paint the edges, and back of the leaf white. Let it dry.

For the curious, I used Aladine paint. I had already used their products for a DIY Christmas decoration (collaboration), and I was amazed by the quality of their paints. I highly recommend them!

There you go! All you have to do is find a place to display it, and you will see that it won’t be empty for long 😉 On my side, I really liked the look of this tutorial and I placed it in the living room, waiting for the entrance/corridor to be remodeled.


If you liked this DIY, feel free to leave a little comment ♥


Save to Pinterest

Céline Lunakim


No Comments